4wd Knuckle Seal Replacement (YM3110D Style)
We have copied this page from the Internet Archive to be reposted here. I felt like it was too good of a resource to get lost and, hopefully, reposting here will help keep it alive.
I would really like to thank Marc S. from Pittsburgh PA for sending us this excellent write-up!
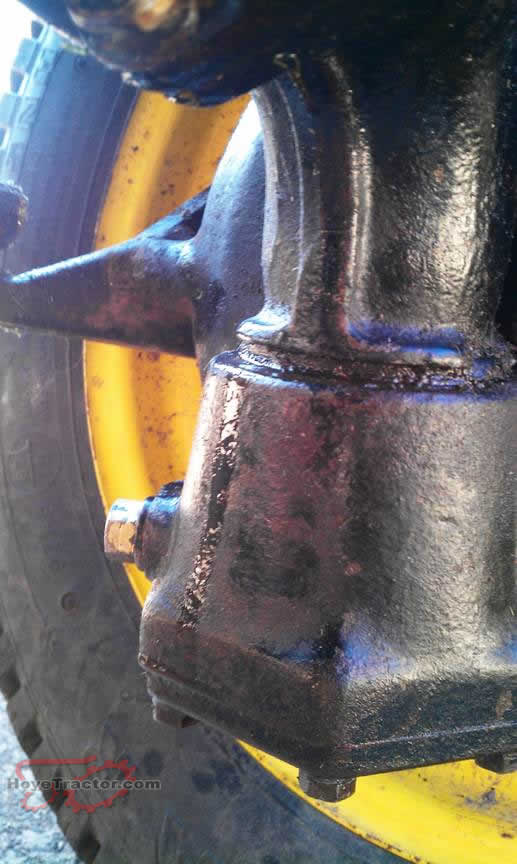
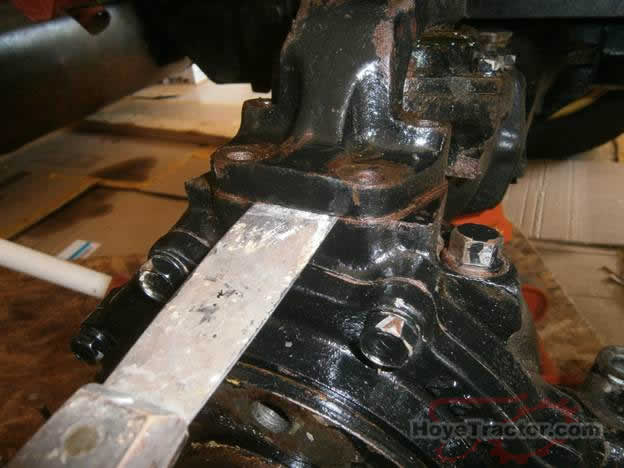
1. This mess is caused by gear oil seeping out of the lower spindle housing due to worn-out seal and sleeve.

2. A close-up view of seal seeping gear oil.
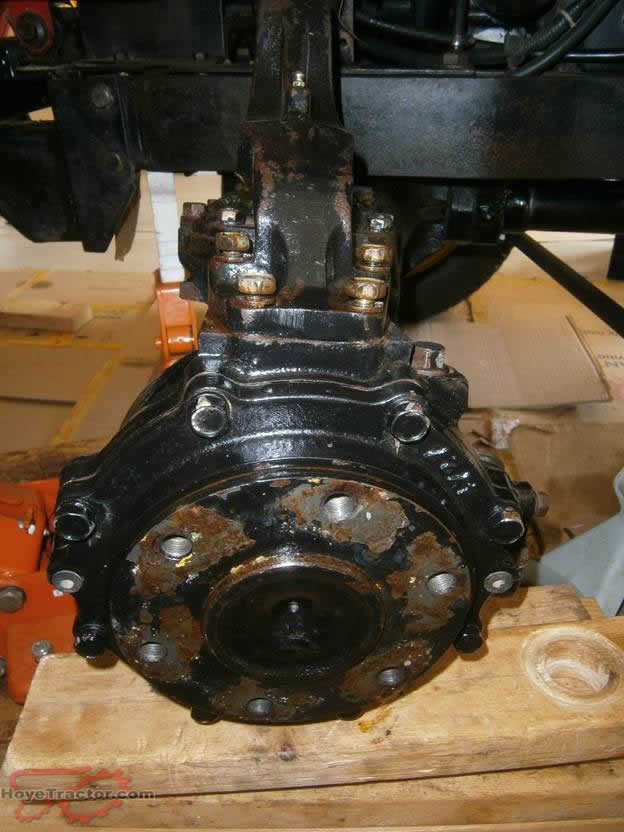
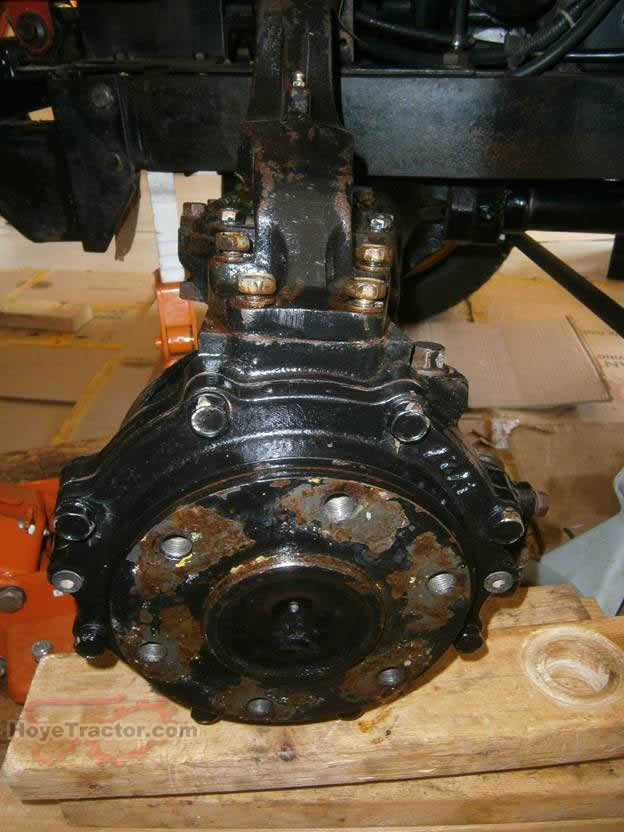
3. Use floor jack to elevate the side of the axle that you will be working on. Remember to place jack-stand under frame for added safety. Disconnect tie-rod from the tie rod bracket. My tie-rod can be seen as swung away in the upper right part of the photo.
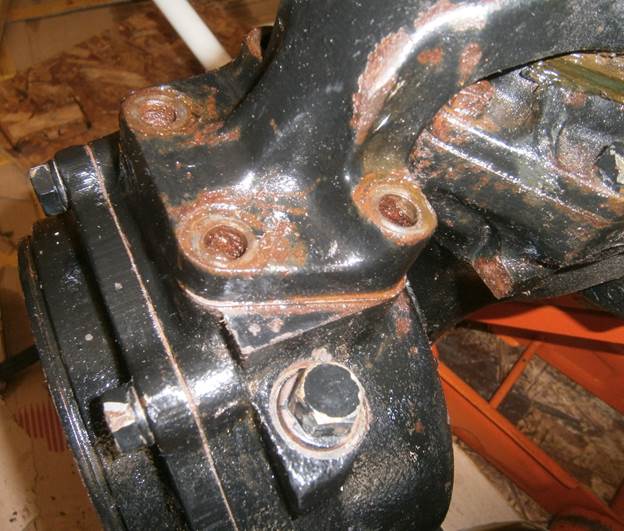
4. Tie rod bracket with tie-rod disconnected. Notice worn top of sleeve at joint above drain plug.

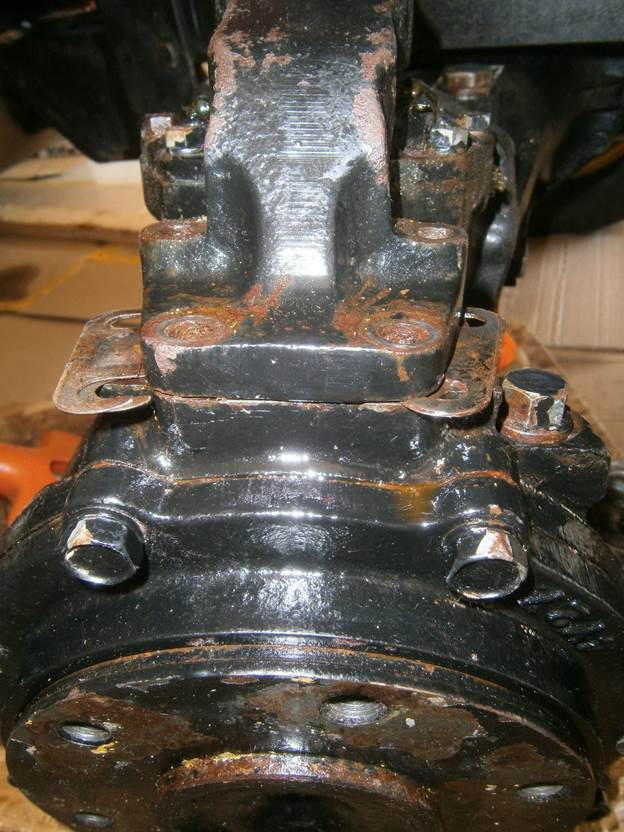
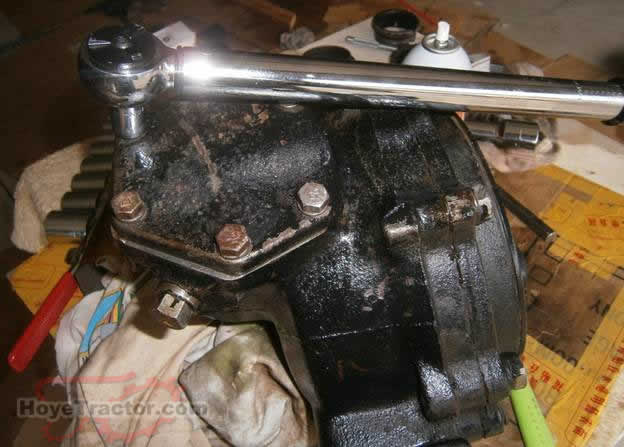
5. Support entire lower front gear case with wood underneath. It is very heavy and you do not want to stress the threads when you remove the 4 bolts from the steering arm assembly. Photo shows the 4 bolts loosened.
6. My lower front gear case was rusted to the steering arm and would not come apart even after the 4 bolts were removed. Notice the shims sticking out slightly between the lower front gear case and the steering arm.
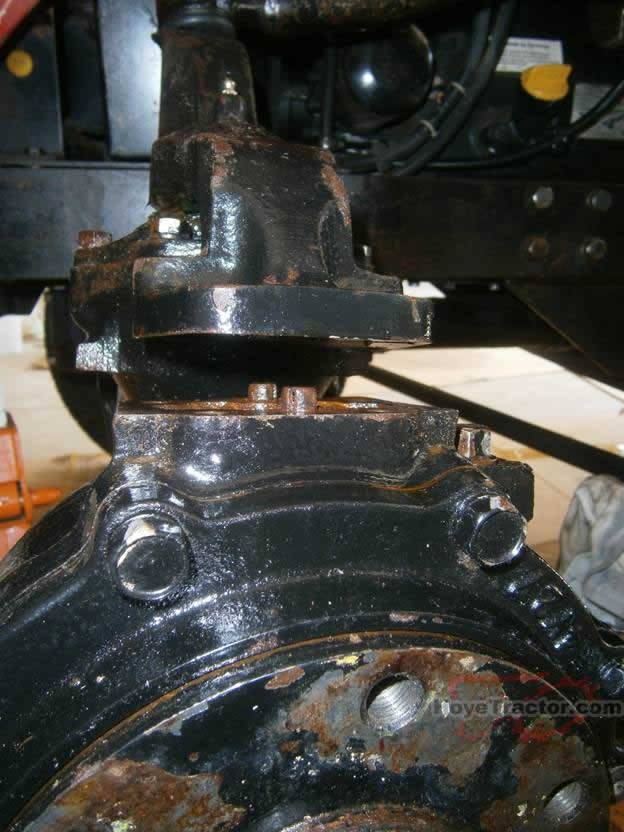
7. Using a lot of penetrating oil and putty knife, I was able to break free the seal of rust.
8. I pulled out 2 shims on each side.
9. With a lot of patience and penetrating oil, I was able to completely separate the lower front gear case from the steering arm.
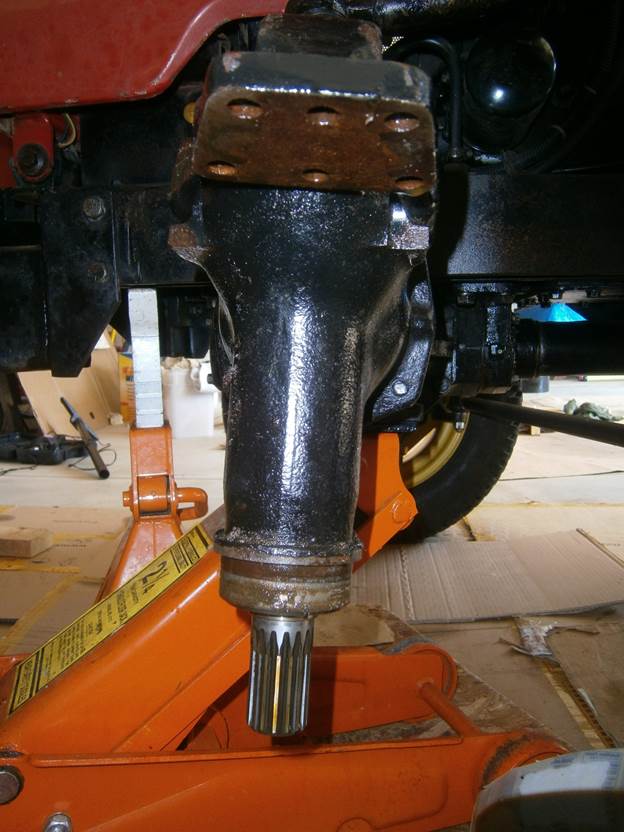
10. Underside of the steering arm. I later cleaned off the rust and oiled the surface.
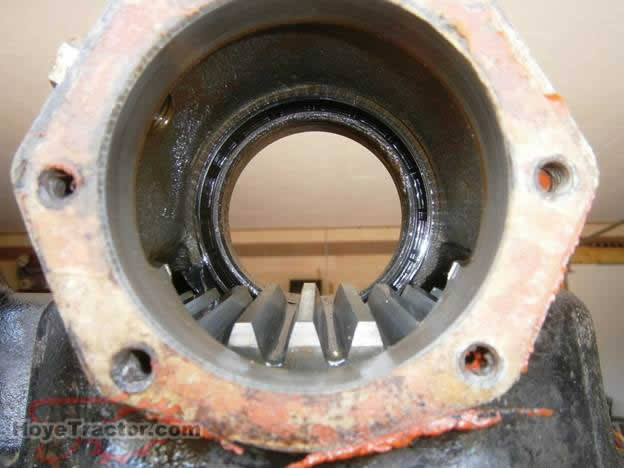
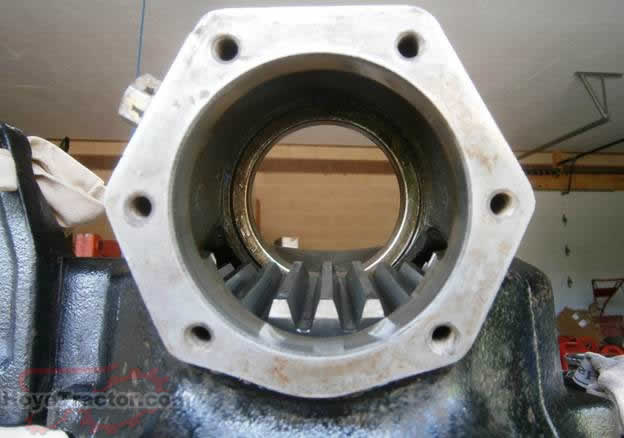
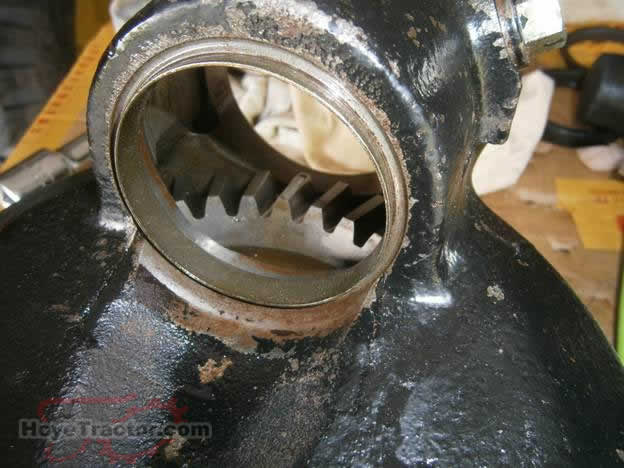
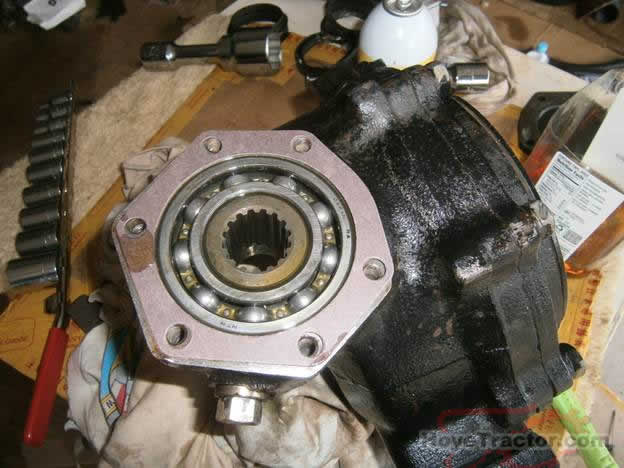
11. Lower front gear case was placed onto solid work table. Notice top-view of round lower spindle gear and partial view of large final gear, brass collar, and rubber seal.
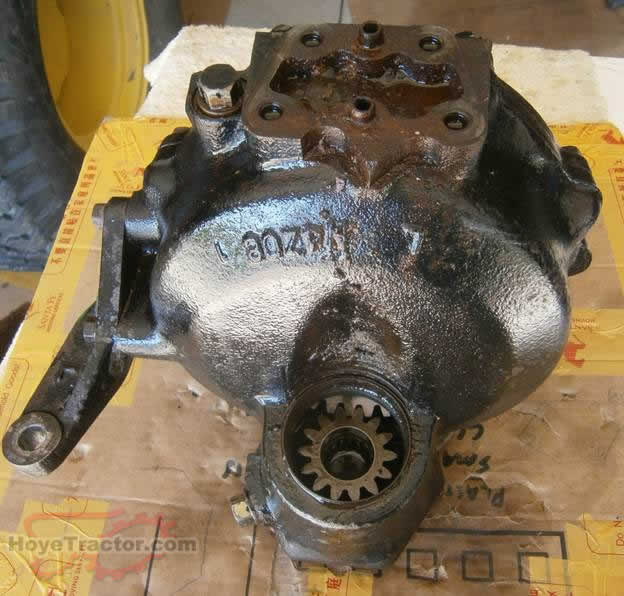
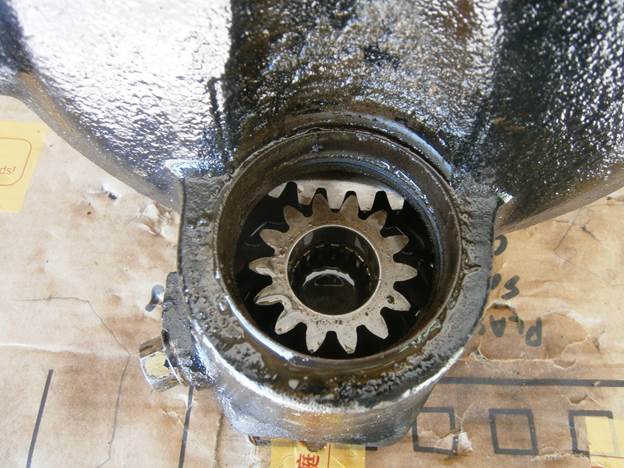
12. Close-up view from top showing brass collar and rubber seal that need to be removed.
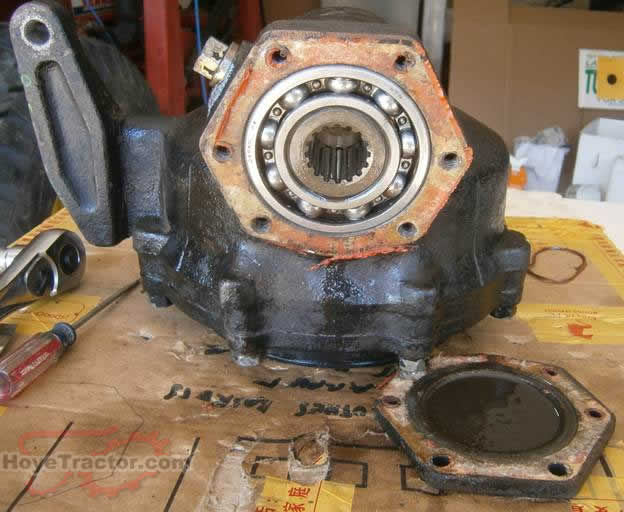
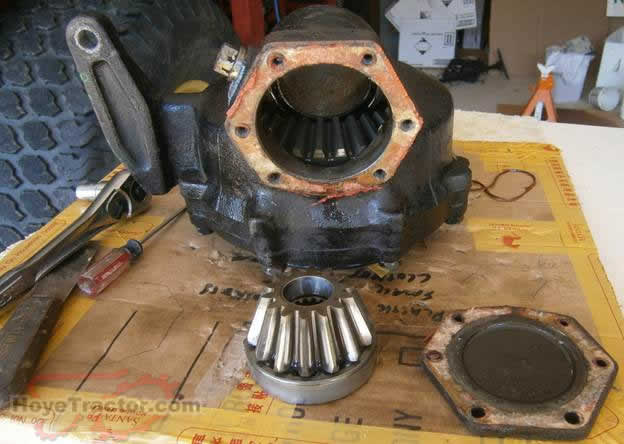
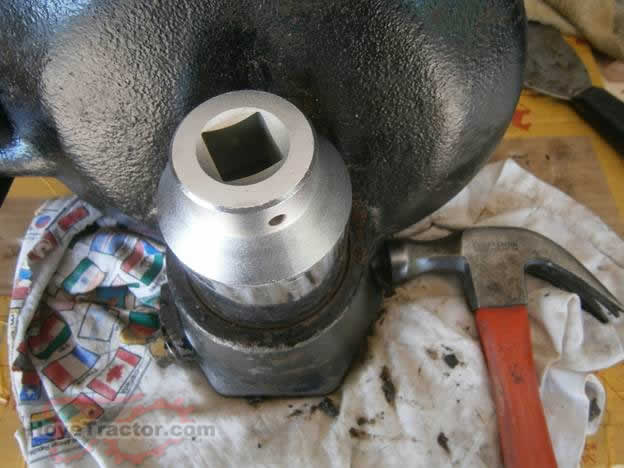
13. Turn lower front gear case onto its flat side (lug nut holes down). Remove 6 bolts that attach the axle housing bottom plate to the bottom of the lower front gear case. Notice bottom of the bearing that is attached to the lower spindle gear.
14. Gently push out lower spindle gear and bearing from the top using rubber mallet. It will come out as one assembly. Be very careful to not drop this slippery assembly. Check for any slight binding by spinning the lower spindle gear and bearing. I soaked mine in clean diesel, spun it in small bucket of diesel to loosen and remove any dirt within the bearing/gear. Finally, I soaked the entire bearing/gear assembly in oil until I was ready to reassemble. Scrape off old gasket residue on both surfaces.
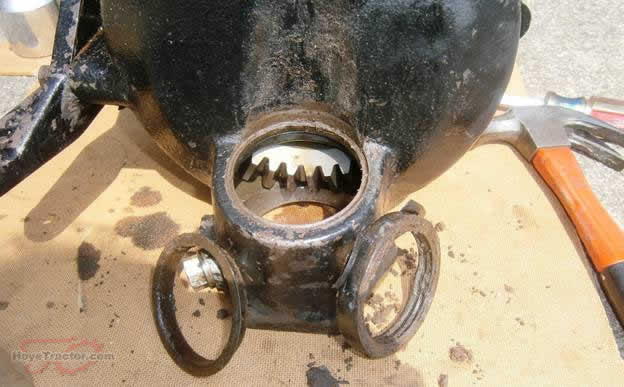
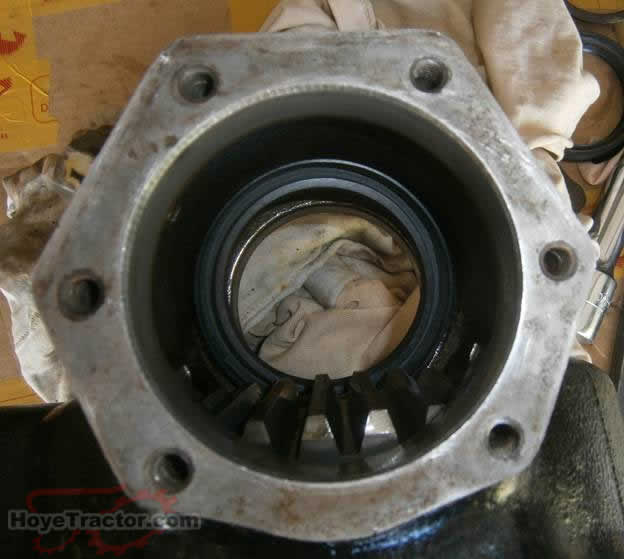
15. Side-top view showing brass collar and rubber seal that need to be removed.
 '
'
16. Bottom view showing brass collar and rubber seal that need to be removed.
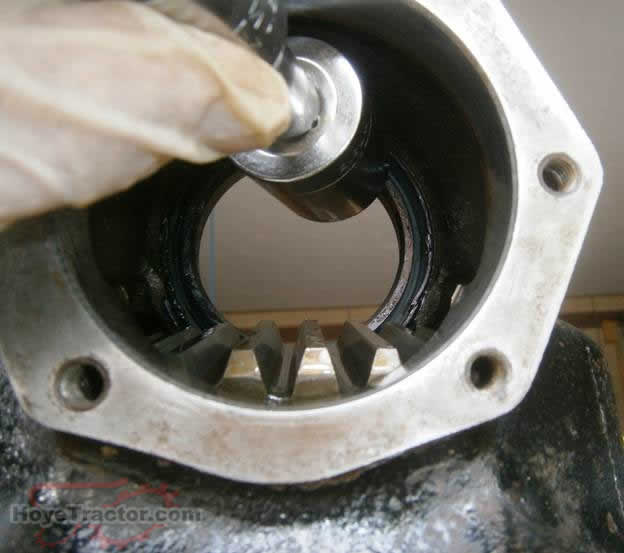
17. Top view showing brass collar and seal removed. I used large flat blade screwdriver to easily prior out rubber seal. See photo 18
for collar removal.
18. To remove brass collar, I used appropriate size socket and hammer to drive-out collar from top.
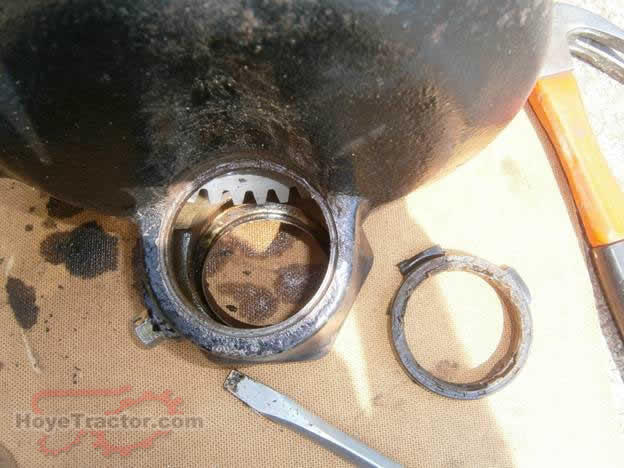
19. View of collar and seal.
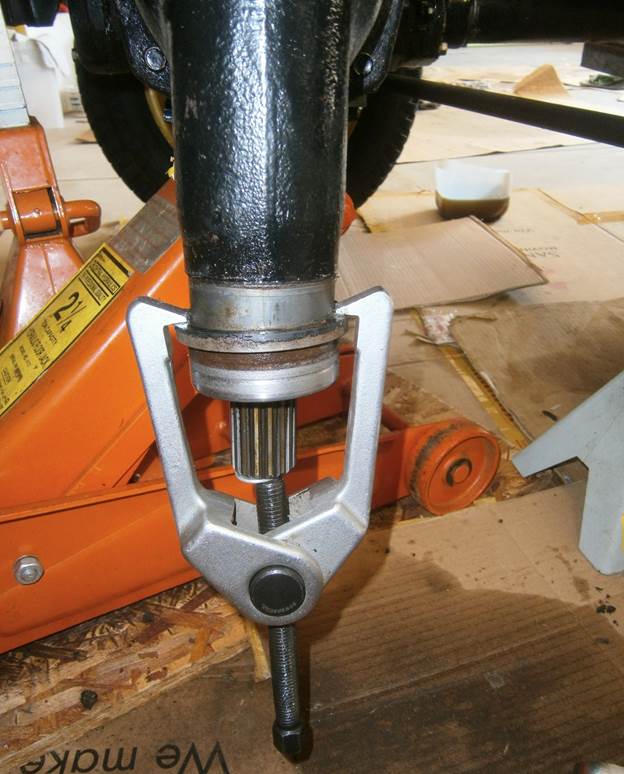
20. Use puller to remove sleeve from bottom of spindle housing.
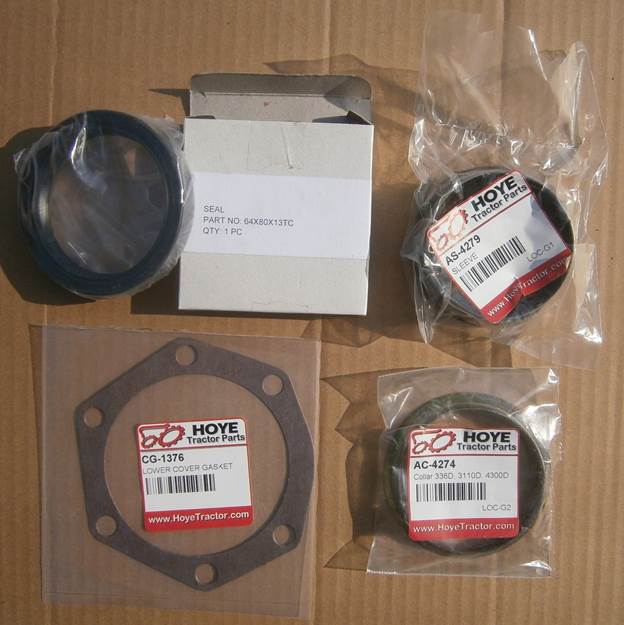
21. [size=150][b]TIME TO INSTALL.[/b][/size] These are the 4 parts that I ordered from Hoye.
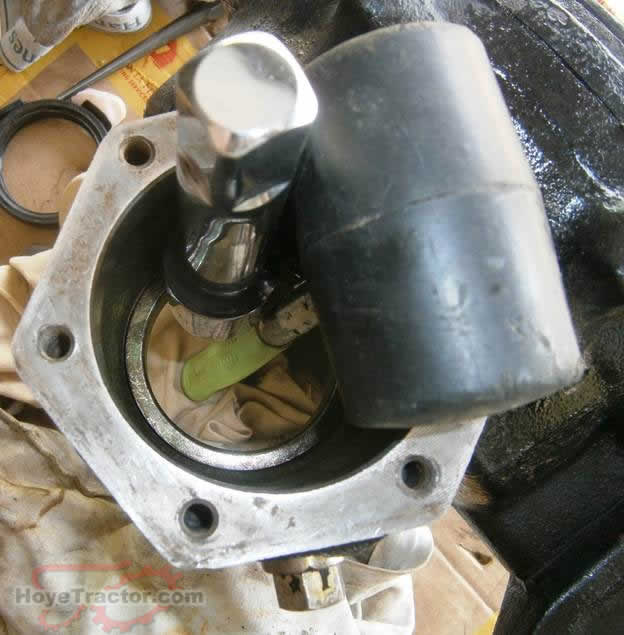
22. Oil-up and install brass collar from bottom using small socket with extension as viewed and installed from bottom. Be careful not to hit the gears!
23. Installed brass collar as viewed from top.
24. The new seal is oiled-up, placed inside with the open end facing BOTTOM. Once again, a socket and extension were used to seat the seal by hitting it up from the bottom on all exposed edges. This is not the ideal way to “punch-in” the seal, but as mentioned in the beginning, it beats disassembling the lower front gear case and removing the large final gear in order to gain clear access. The seal is rubber coated on steel. Notice in the second photo, the distortion to the rubber caused by hitting the socket in order to seat the seal inside the spindle housing and against the brass collar. Mine was a VERY tight fit. Don’t worry because this outer ring of the seal does not contact the part of the sleeve that attaches to the bottom of the lower spindle housing that will form a tight seal to prevent oil from leaking.
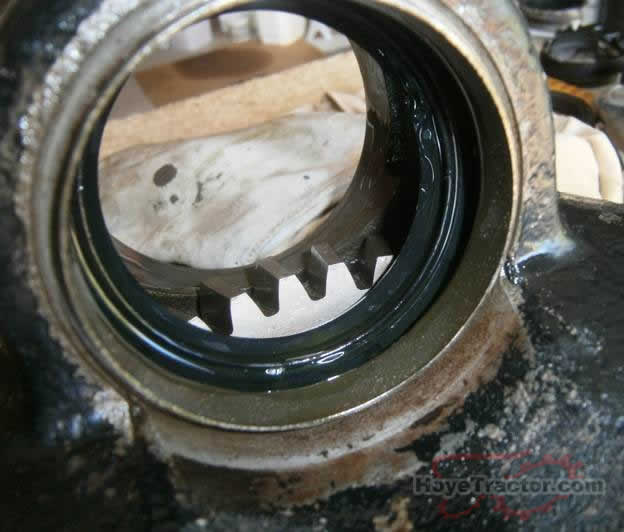
25. Views from top of seated rubber seal.
26. Carefully oil-up and install lower spindle gear/bearing assembly into bottom of spindle housing. Place gasket on to the bottom of the spindle housing and attach axle housing bottom plate using 6 bolts and torque wrench at proper setting.
27. Oil-up inside of sleeve and spindle housing. Install sleeve at bottom of lower front spindle housing by driving it up until it hits the two stops in the casting. I did not have the exact fit to act as a driver; so I cut a piece of PVC pipe, used a large screwdriver to pull it apart so that the pipe would fit around the lip of the sleeve. I used the side of a sledgehammer to drive it up. Once properly seated, the screwdriver was necessary to once again split apart the pipe so that it could be removed from the sleeve.
28. Two people are required for this final step. Support lower front gear case on wood boards and place into position under spindle housing and spindle shaft. Have one person (the stronger individual) lift up the lower front gear case and match-up the lower spindle gear that is already inside of the lower front gear case to the spindle shaft which extends out of the spindle housing. At the same time, the rubber seal in the lower front gear case will mate with the sleeve on the spindle housing and the other person installs the bolts. It is best to either support the lower front gear case with wood (or muscle) instead of using the 4 bolts to raise the heavy gear box.
29. Be sure to reinstall the shims that were removed. Proceed to torque the 4 bolts to proper specifications.
30. After properly torqueing the 4 bolts, the job is complete. After installing the wheel and removing the jack, the weight of the tractor will compress the rubber seal and sleeve to form a tight seal that will prevent gear oil leaks.
Again... We would really like to thank Marc S. from Pittsburgh PA for sending us this excellent write-up!